If you’re a photographer who utilizes a Mac for post-production, having a seamless, streamlined workflow from camera to computer is vital. Mac and digital cameras can work harmoniously to create a smooth, efficient process. So if you are wondering how Canon camera connect Mac, read the following blog,
Embrace the Digital Realm: Understanding the Basics
Before diving into how the Canon camera connects to Mac, it is essential to understand why it is beneficial. Transferring images directly from your camera to your Mac bypasses the need for additional storage devices. This direct process saves time and reduces the chances of losing your precious shots due to misplaced or malfunctioning storage media.
Step-by-Step: Setting Up Your Camera-Mac Connection
Physical Connection
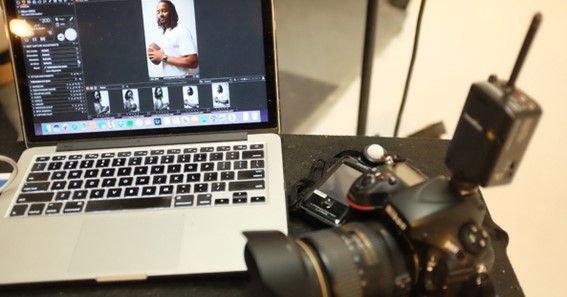
The first method for connecting a Canon camera to Mac is using a USB cable. The physical connection is straightforward. Find the matching ports on your camera and Mac, then plug in the cable.
Recognizing Your Camera
Once connected, your Mac usually recognizes your camera as an external storage device. You should see an icon appear on your desktop. If you do not see the icon, check your camera’s settings.
Transferring Your Images
After your Mac recognizes your camera, you can open the icon and transfer your images. Drag the files from the camera folder to a folder on your Mac. The organization is key to an efficient workflow, so consider creating a dedicated photography folder with subfolders for different sessions or themes.
Click here – Maintaining Brand Integrity: Best Practices for Branding Compliance
Hone Your Workflow: Tips for Efficiency
Tip 1: Batch Processing
Batch processing is a huge time saver. You save time manually editing each picture by applying the same edits to a group of images at once.
Tip 2: Regular Backups
Backing up your images regularly is crucial. This practice saves you from potentially losing your work and frees up storage on your camera and computer.
Tip 3: Use Keyboard Shortcuts
Keyboard shortcuts can drastically speed up your workflow. Learning the most useful ones for the applications you use the most will save you hours in the long run.
Unleashing the Power of Wireless Transfer
Images can be sent wirelessly from your camera to your Mac. This feature might not be available on all camera models. But, it can be a game-changer if the option is available.
To set up a wireless transfer, consult your camera’s user manual. The process will likely involve connecting your camera and Mac to the same Wi-Fi network, then adjusting some settings on both devices. Once set up, the transfer process should be as simple as clicking a button.
Conclusion: Streamlining to Free Up Your Creative Energy
Your camera and Mac are powerful tools in your photography arsenal. By streamlining the process of connecting the two, you are freeing up more time and mental energy to focus on what you love: capturing and creating beautiful images. It may seem like a lot to take in initially, but remember, every expert was once a beginner. After all, photography is about enjoying the journey as much as the end result.