If your answer to ‘What comes after morning coffee’ is afternoon coffee, and if you think OCD is the acronym for Obsessive Coffee Disorder, you are a certified coffee person!
Starting your day with a sip of your favorite coffee from your coffee cup isn’t just a routine. It’s part of your character and reflects who you are. The coffee cup you choose is also an expression of your creativity.
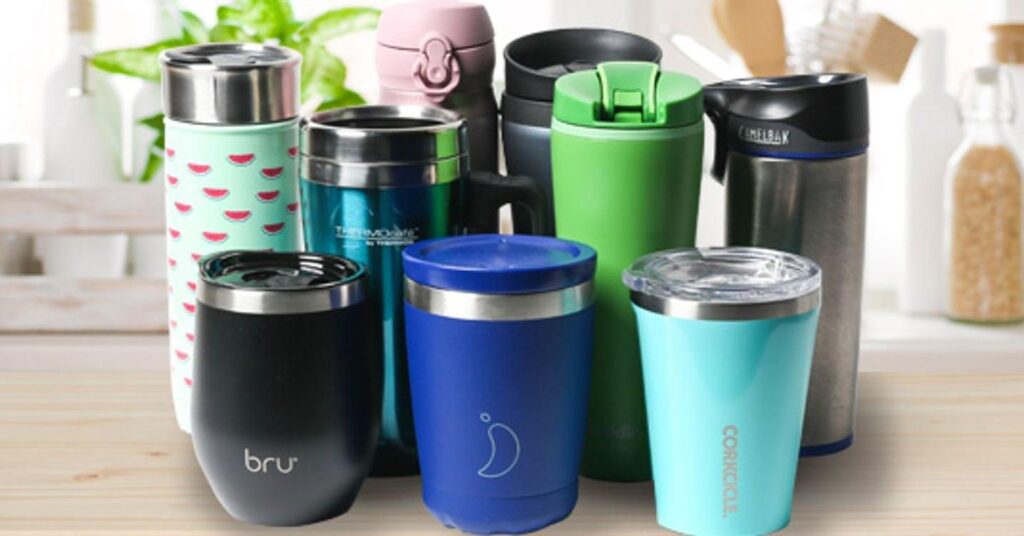
Many of us don’t hesitate to grab a coffee cup on the go, get a quick refill, and then toss the cup in the trash. Do you hear an inner voice saying, ‘Hey, that’s me!’
Now, don’t feel guilty, and you don’t have to give up your daily coffee. Simply use a travel cup. This not only cuts down on daily single-use plastic waste but can also add a touch of style.
Whether it’s your morning brew or an afternoon pick-me-up, why not turn your cup into a canvas that reflects your style? We can show you how to decorate your home coffee cups, travel mugs, and even those reusable coffee cups to enjoy a highly personalized experience.
You are not the only one who believes that your coffee mug can make your coffee taste better. There is nothing wrong with having your cup in those white ceramic mugs, but hey, they are so plain and conventional. Jazz them up and enjoy a new way of savoring your coffee.
Let’s explore a few ways of doing it.
Screen Printing
Screen printing involves transferring a stenciled design onto any surface. You need the following items:
- Mesh screen.
- The appropriate ink.
Screen printing utilizes specialized inks for metal-based cups and glass, with fabric and paper being the most used surfaces. One can create the design by using a stencil on a fine mesh screen and then driving up the ink with a squeegee. This helps transfer the printed design to the underlying surface or the metal cup.
Next, the cup passes through a dryer, curing the ink and ensuring a smooth and durable finish.
Inkjet Printing
Inkjet printing offers a cutting-edge and creative method for full-color image printing on coffee cups. UV inkjet printing is preferred over traditional printing because it solidifies the ink upon exposure to UV light. It is important to note that travel mugs made of stainless steel or coated tumblers require UV adhesion promoters to help the UV ink bond to the material.
With cylindrical or rotary attachment options available for UV printers, this technology provides diverse printing capabilities, including options for handling multiple mugs simultaneously.
UV inkjet printing allows the printing of white and CMYK inks on colored and clear cups without special coatings.
Silicone printing
These inks are exclusively printed on silicone rubber. The ink has high opacity, gloss, and unaffected by abrasion. Silicone inks are ideal for custom-printing your favorite designs on different silicone applications, including silicone cups. Other types of inks, such as solvent-based inks, will not work on this material.
Additionally, silicone-based ink is the only type of printing ink capable of flexing, stretching, and adapting to the movements of silicone. It also adapts to the high temperatures commonly associated with silicone applications. Once the curing process is complete, silicone ink matches the resilience of silicone, ensuring durability in any silicone-related usage.
The two best printing processes for silicone are either pad printing or screen printing. Many prefer pad printing for its simplicity, but screen printing remains a viable alternative. Pad printing delivers vibrant prints with less ink, reducing costs and accelerating curing. Screen printing, on the other hand, delivers high-opacity prints.
Sharpie Printing
If you are planning a DIY Sharpie Travel Mug, there are varying opinions on the choice of mugs for decorating. Some suggest using inexpensive Dollar Tree mugs, as their cheap glaze helps the paint adhere better. Others recommend selecting mugs with a matte glaze. The moderately shiny surface helps prevent paint from bubbling in heat.
Dollar Tree mugs appear to be a better choice as they can withstand use, especially if hand-washed instead of putting them through a dishwasher.
Acrylic Paint
Acrylic paint is a popular choice for many for customizing coffee mugs, probably because of the versatility and vibrant color palette it offers. This medium is not only easy to work with but also allows for the creation of stunning designs on your favorite coffee mug. And they last as well.
Ensure the mug is thoroughly clean and dry before initiating the painting process. This is crucial for optimal results. A primer can prove beneficial in improving the adhesion of the paint.
After completing the painting, we highly recommend using the heat-set method. This step not only aids in better adhesion but also contributes to the overall durability of the design. Using acrylic paint pens specifically formulated for ceramic mugs can produce exceptional outcomes. It is a great way to add a personalized touch to your daily coffee ritual.
Once the paint has dried, seal the acrylic artwork on your ceramic mug. Start with a clean surface, free from any dust or dirt. Apply a thin layer of acrylic sealer across the entire mug, ensuring comprehensive coverage of the paint. Allow the sealer to dry completely before using a second coat for added protection.
The sealed mug is ready for use when the surface has dried completely. It is a highly satisfying way of expressing your creativity. Always hand wash the mug if you want the sealer and paint to last.
White Glue or Decoupage Glue
Transform coffee cups creatively with versatile white glue and the decoupage formula, which can be used on glass, ceramic, metal, and other surfaces. This medium takes coffee cup decorating efforts to a different level, serving as a glue, sealer, and finish all in one.
The white glue’s ability to provide a permanent decoupage effect while maintaining washability sets it apart. After proper application and curing, you can hand-wash or clean your creative coffee cup on the dishwasher’s top shelf.
There are a few steps to follow before you begin the crafting process.
- Prep the glass, ceramic, or metal surfaces with a cleansing alcohol rub for a pristine canvas.
- Use a soft bristle brush and apply two to three thin layers of topcoat.
- Allow the surface to dry for a couple of hours between each coat.
The formula transforms into a hard finish with no tackiness, ensuring a smooth and polished surface.
Cleaning up is a breeze, as this glue is non-toxic, and water based. Just remember to leave a space for your sips, as the crafted mug may not be entirely food safe.
Sublimation Ink
Why settle for the ordinary when you can infuse creativity into your daily rituals? A sublimation-printed coffee mug can be a great choice as a lasting and practical promotional product. Sublimating a cup is a simple and affordable way of personalizing your coffee cup. The possibilities are endless, whether it’s adding meaningful text or impactful images. Add a customized touch with your business logo gracing the surface. Transform the ordinary coffee routine into a personalized experience.
The following steps and supplies are involved in the sublimation process:
You will need an inkjet printer compatible with sublimation printing, sublimation paper, heat-resistant tape, and a mug heat press, besides the usual accessories.
The design processes.
To achieve optimal results for your coffee cup design, you need graphic design software. An average-size template is recommended for accommodating a full-wrap design from one side of the handle to the other. This template allows up to three mug designs on a single A4 sheet.
Preheat the mug.
Preheat the blank sublimation mug for optimal ink transfer during heat pressing. It ensures peak ink reaction for a consistent and high-quality transfer. It also helps reduce the risk of fading at the mug’s bottom, where the ceramic is denser and requires more heat for an even design transfer.
Preheating also prevents sudden temperature changes that may cause ceramic cracks or the shattering of mugs.
Print the design.
Prepare the transfer process by trimming the printed paper to an appropriate size. Wrap the paper around the mug’s exterior, beginning from one side of the handle and progressing to the other. Secure it in position using heat tape. Ensure the paper wrap fits snugly against the mug surface to prevent creasing during the heat press application. Press for about three minutes, remove the mug from the heat press, and allow it to cool. Remove the transfer wrap paper.
Your sublimation ink-designed coffee cup is ready for use.
Conclusion
Customizing your coffee cup can be fun and exciting if you can access a simple and friendly process. As we have seen, the possibilities are as diverse as the blends themselves. Whether you opt for the flexibility of silicone ink or the vibrant hues of sublimation, each method adds a unique touch to your daily coffee experience. So, why settle for ordinary when your coffee cup can reflect your creativity? Embrace the art of cup customization and make your coffee moments truly enjoyable.